
HomePlantBot care guide
Self‑Watering Planters & Watering Aids
Test the assembled system while you are home before relying on it.
Will this reservoir and wick work for the actual pot?
Test the assembled system while you are home before relying on it. Check wetness throughout the root zone, how the reservoir empties and where an overflow goes. A one-inch hole location or a refill calendar cannot establish suitable water delivery for every design.
What you’ll learn in this article
- Key tools and materials needed for self-watering setups
- Step-by-step DIY instructions to build your own self-watering planter
- Effective use of watering aids like spikes, globes, and drip systems
- Pro tips for maintenance and creative automation upgrades
Affiliate disclosure: HomePlantBot may earn from qualifying purchases through the Amazon links below, at no extra cost to you.
Introduction
Managing plant care can be challenging—especially for those with hectic schedules or small business owners juggling storefront aesthetics. That’s where self watering planters and watering aids offer a smart solution. These DIY-friendly setups eliminate the need for daily watering, help conserve water, and promote healthier plant growth.
By maintaining consistent soil moisture, self-watering systems reduce stress on plants and minimize routine upkeep. This guide is designed for DIYers, home gardeners, and office decorators aiming for lush greenery without constant attention.
Whether you’re keeping indoor succulents happy or maintaining curbside planters professionally, you’ll learn:
- Essential tools and cost-effective materials
- Step-by-step builds for self-watering planters
- Tips for integrating watering globes, spikes, and drip kits
- Creative automation hacks using everyday tools
Equipment & Materials
Required Tools
- Drill + bits: To create drainage, overflow, and reservoir access points
- Utility knife: For cutting bottles, wicks, and plastic components
- Measuring tape: To size wicking cords and reservoir height
- Scissors and pliers: For trimming materials and installing irrigation aids
Materials & Supplies
- Planters: Plastic, ceramic, or upcycled containers (with or without built-in reservoirs)
- Reservoir containers: Clean plastic bottles, yogurt tubs, or food-safe containers
- Wicking materials: Cotton rope, felt strips, or nylon cord
- Potting mix: A lightweight, well-draining blend with moisture-retaining ingredients like coco coir or perlite
- Watering aids:
- Glass watering globes
- Ceramic irrigation spikes
- Simple drip irrigation kits
- Optional: Activated charcoal, mesh screen (for root separation), float indicators
Where to Buy Supplies Affordably
You can find many supplies at home improvement stores, thrift shops, or online sustainability markets. For an organized list of recommended products and DIY kits, visit our Tools & Supplies DIY Guide.
Step-by-Step Instructions
Creating a DIY Self-Watering Planter
- Choose the Right Container: Select a pot that’s appropriate for the plant’s mature size. Look for options with a wide base, and ensure it allows for either internal or external reservoir setup.
- Build the Reservoir System:
- Method 1: Double Pot with Wicking
Nest a smaller pot inside a larger sealed container. Run a wick from the inner pot’s base into the space below (reservoir). Fill the outer pot’s base with water. - Method 2: Plastic Bottle Reservoir
Cut and invert a large plastic bottle neck-down. Insert into a planter’s bottom. The top becomes a water chamber, while the wick runs from it into the soil.
- Method 1: Double Pot with Wicking
- Drill Overflow Hole: Use a validated design for the exact container dimensions, air space and overflow path; a hole one inch above the base does not universally prevent root flooding.
- Insert Wick: Feed your wicking material through drainage/holes, ensuring it touches the water chamber and extends at least 1–2 inches into the soil area. Secure for even moisture distribution.
- Add Potting Soil and Plant: Layer moist potting mix on top of the wick, firming gently. Position your plant centrally and fill more soil around it, avoiding compaction.
- Fill and Test: Add water to the reservoir until it just covers the wick. Wait several hours to confirm upward moisture movement. Add more water as needed.
Integrating Watering Aids
| Watering Aid | Installation Tip | Best Use |
|---|---|---|
| Glass Globes | Insert at 45° angle into soil so the stem reaches root level; check the actual product instructions and root-zone moisture; no fixed three-to-five-day refill rule | Small indoor or desk plants |
| Ceramic Spikes | Attach to a water bottle upside-down and push into planter soil | Outdoor containers & garden beds |
| Drip Irrigation Kit | Connect via microtube to reservoir pump or hose; use timer or solar controller | Large planters, raised beds, or grouped pots |
Helpful products for this care problem
Helpful products for this plant care problem
If this is the issue you are solving, these tools can make the next step easier. They are optional, but they match the care problem covered in this article.
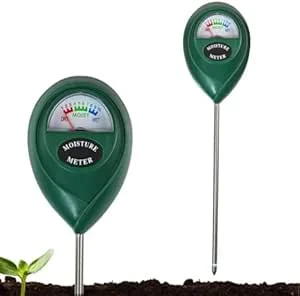 Soil moisture meterHelps check whether the root zone is actually ready for water.View on Amazon (paid link) ↗
 Digital hygrometerHelps track humidity and temperature around sensitive plants.View on Amazon (paid link) ↗Clip-on grow lightUseful for dim rooms, winter care, and plants stretching toward light.View on Amazon (paid link) ↗
As an Amazon Associate, HomePlantBot may earn from qualifying purchases.
Tips & Safety Considerations
Best Practices
- Indoor setups: Ensure spillproof designs and regularly check for standing water to prevent mold.
- Outdoor planters: Use UV-resistant materials and position overflow holes to direct excess water away.
Common Pitfalls to Avoid
- Using heavy or compacted soil that impedes water movement
- Skipping overflow holes—this causes root rot
- Too-short or loosely placed wicks that fail to draw sufficient water
Ongoing Maintenance
- Check water levels 1–2 times a week
- Rinse the reservoir once per month
- Inspect wicks and roots, clean the accessible reservoir as directed and repot only when the plant or medium actually needs it
Tool Safety Notes
- Use gloves and cut-resistant surfaces when modifying plastic containers
- Store cutting tools and drills safely out of reach of children
Creative Upgrades
- Rain Sensors: Automate outdoor watering systems based on real-time weather
- Liquid Fertilizer Mixing: Use a feeding program compatible with the actual planter, medium and any initial fertilizer charge; a reservoir does not make nutrient mixing automatic
- Decorator Planters: Wrap outer containers in jute, paint, or decals to match your décor
How to Build This in Make.com
Keep a dated observation log with plant identity, method, symptoms, changes and the next check. A reminder or image-confidence score is not a plant diagnosis or proof that roots received water.
Conclusion
Self-watering planters and watering aids make plant maintenance nearly effortless. They conserve water, encourage healthy growth, and reduce the stress of daily watering routines—ideal for busy lives and thriving small business setups.
With a little creativity and the right materials, you can design your own custom system that blends seamlessly into any indoor or outdoor environment. Don’t be afraid to experiment with automation tech, upcycled containers, or waterproof décor enhancements.
Explore more helpful DIY content and get all the tools you need on our full supply page: DIY Tools & Supplies Portal.
With a well-built setup, plant care transforms from a chore into a calming, nearly passive experience. Welcome to greener living—on autopilot!
Need help choosing the next care step?
If the symptoms in this article match your plant, use Plant Bot or the rescue checklist before buying anything. A quick diagnosis helps you fix the actual cause, not just the most visible symptom.
Quick decision checklist
- Check the growing conditions before changing everything.
- Adjust one care factor at a time.
- Use symptoms to guide the next step.
- Give the plant time to respond after corrections.
Before leaving a self-watering system unattended
- Observe it through representative refill cycles.
- Check for leaks, blocked delivery, persistent saturation and dry pockets.
- Record actual reservoir use instead of assuming days of coverage.
- Arrange a physical check if a failure would leave the plant dry or flood the room.
Sources for these corrections
This source check supports targeted corrections and practical guidance. It does not establish a complete fact-check of every legacy claim or a plant-growth trial.